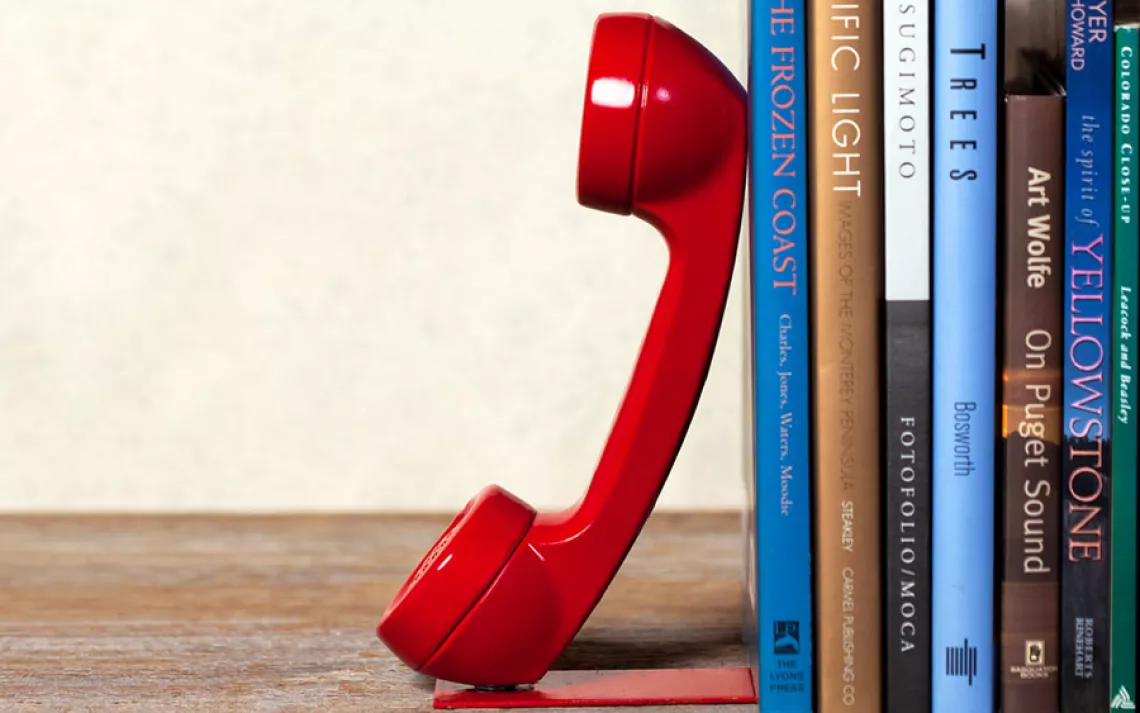
Telephone Bookend
A good call for your bookshelf.
Click through our slideshow for instructions on how to turn a rotary phone into a bookend.
Landline phones seem to be going the way of the telegraph -- more than a quarter of U.S. households have gotten rid of them since 1992, according to the Census Bureau. But I'm not sure this rush to embrace new technology is such a good idea. The landline phone is the Clark Kent of telecommunications: overlooked and underappreciated, but the thing that just might save you in a large-scale emergency. While cellphone towers can get overloaded, this superhero in disguise has its own electrical system that still works when the lights go out. There are even ways to access the phone jack's electricity to, say, power up a small lamp. But that's illegal and possibly dangerous, so I'm not recommending it; I'm just saying that landlines are secretly cool.
But if you have gone wireless, your unplugged telephone doesn't have to go to waste. I took the handle off mine and screwed it into a flat piece of metal so that it stands upright. Then I spray-painted the whole thing red. My new bookend props up the books I'll be reading during the next power outage, perhaps with some help from my phone jack.
What You'll Need
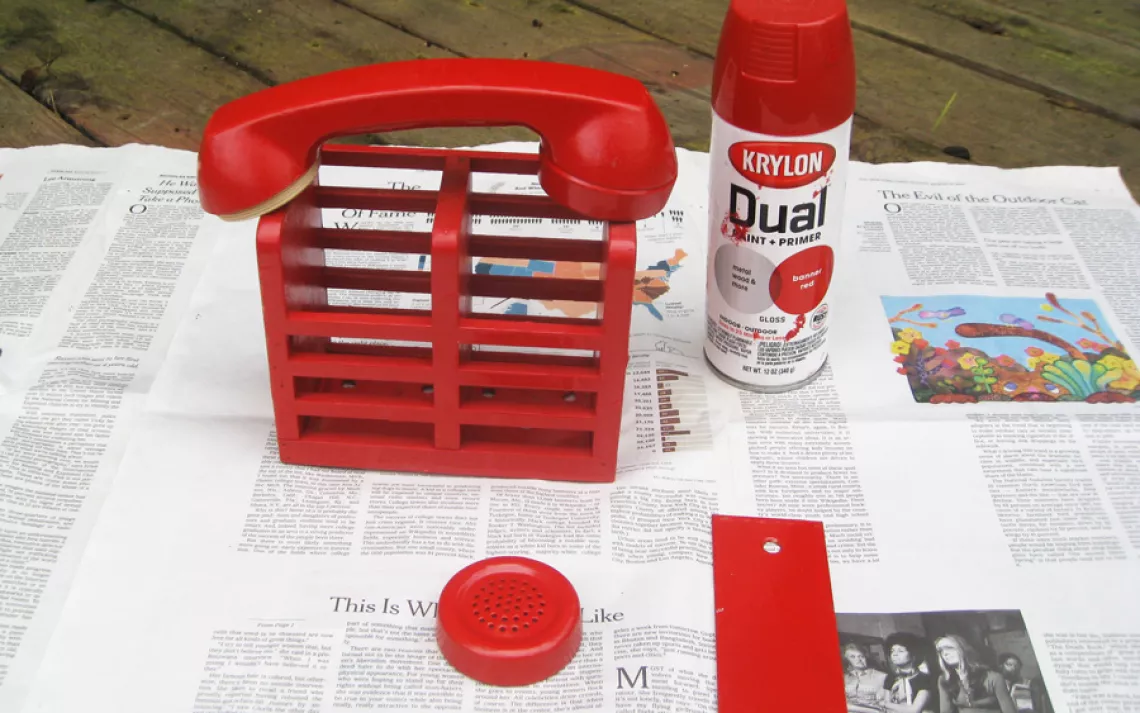
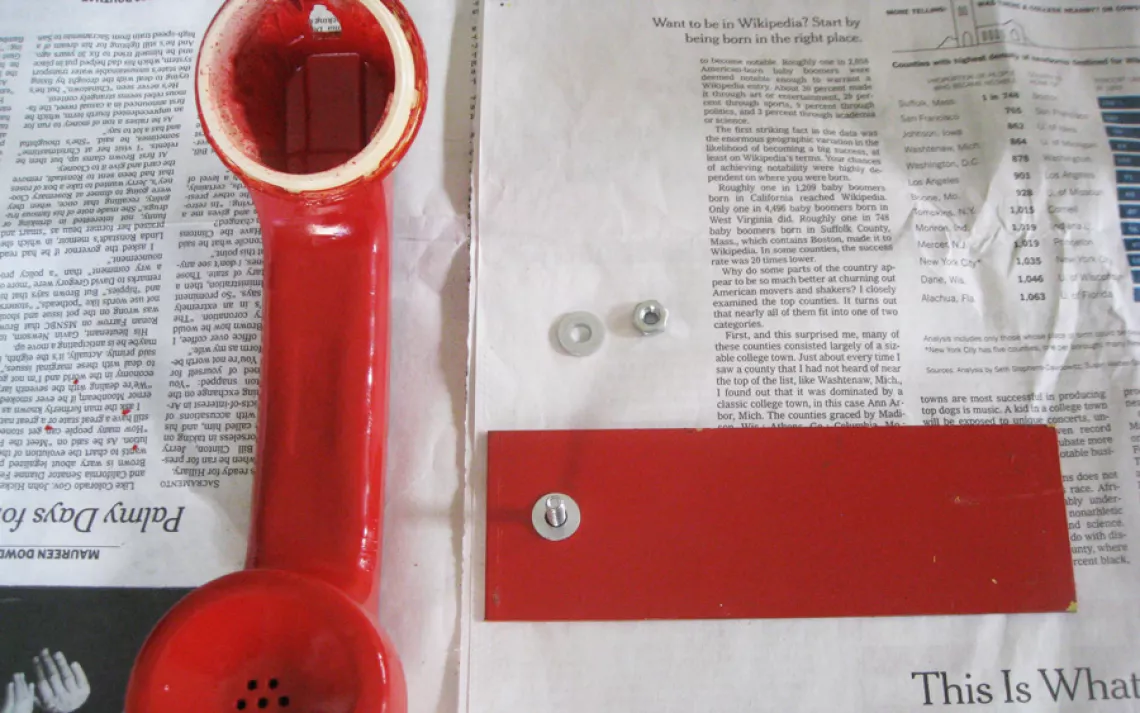
- Flat piece of metal (approximately 6 by 2½ inches)
- Tape measure or ruler
- Clamps
- Goggles
- Gloves
- Electric drill
- Two drill bits (one sized to the circumference of the threads of the screw and another to the head)
- Flathead machine screw (sized to fit through the metal piece and the jack opening in the handset)
- Piece of felt
- Sewing scissors or cutting wheel
- Telephone handset (from a rotary phone)
- Pliers
- Spray paint
- Glue
- Nut and two washers to fit the machine screw
Wendy Becktold
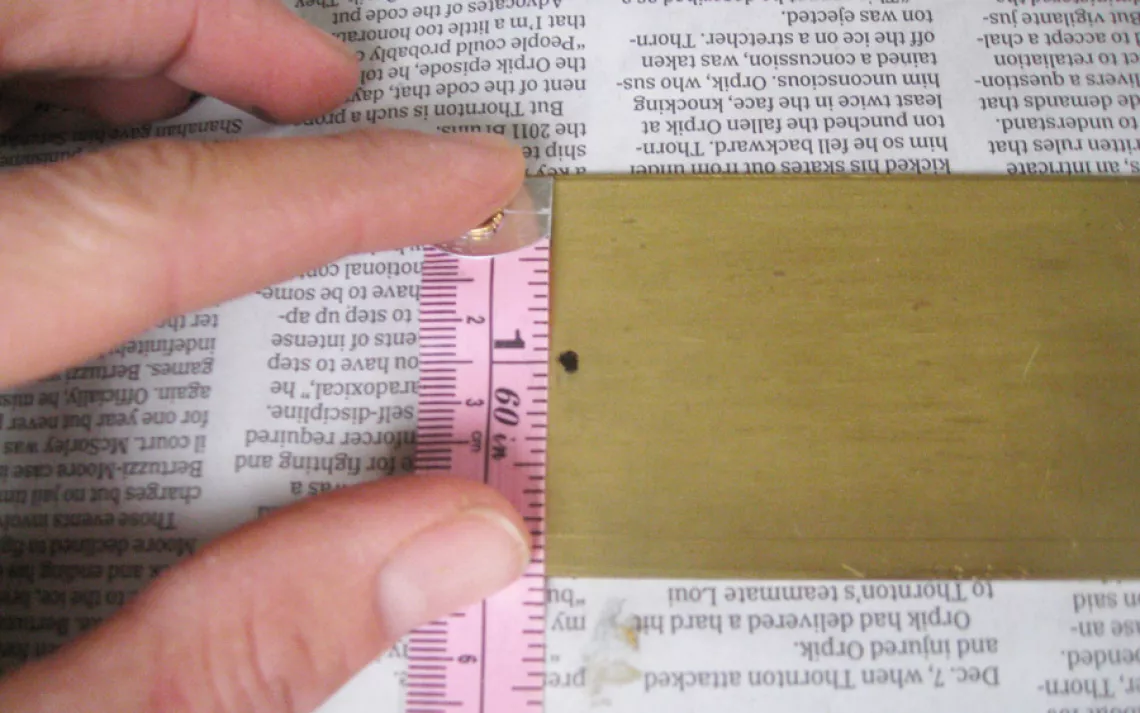
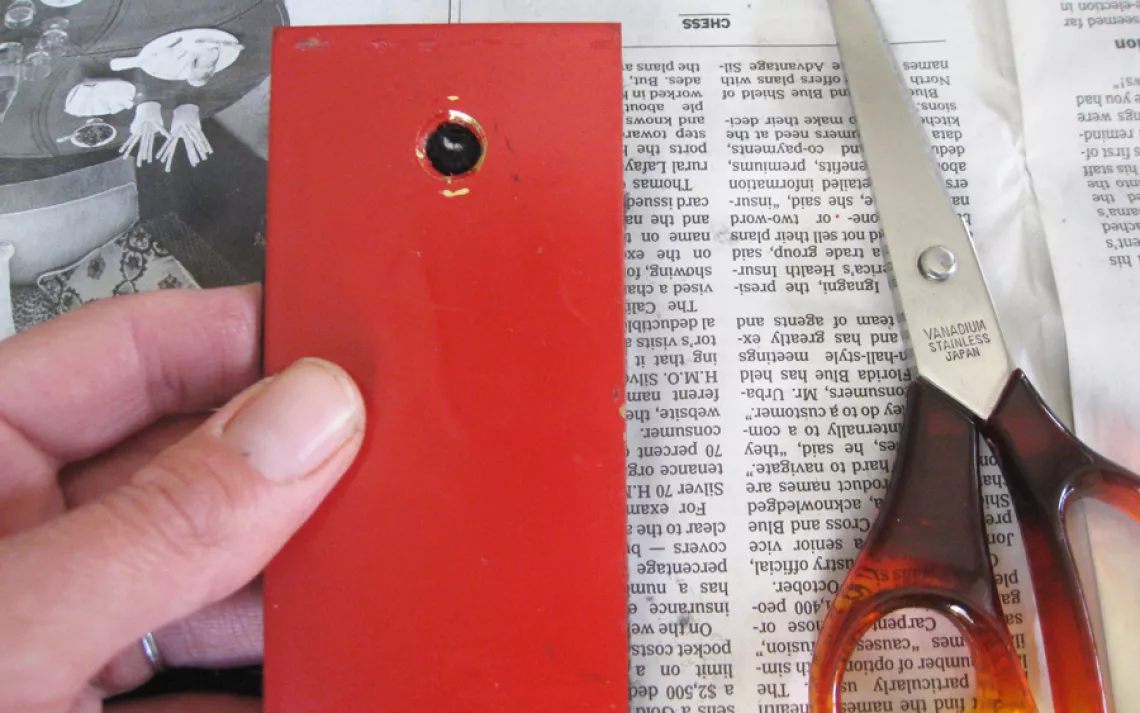
Step 1: Decide where you want the phone to sit on the metal piece. Use a pen and a tape measure to mark the center.
Wendy Becktold
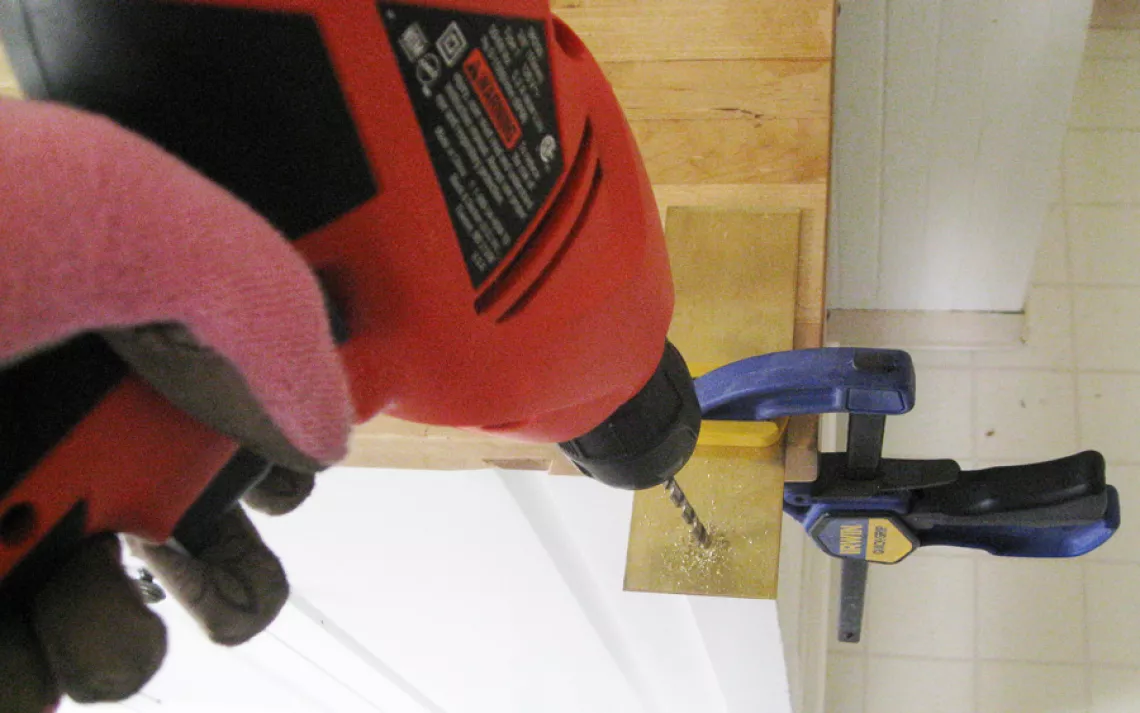
Step 2: Clamp the metal piece down securely and -- after putting on goggles and gloves -- drill a hole with the smaller drill bit. (Watch this informative video for specific instructions on how best to drill through metal.)
Wendy Becktold
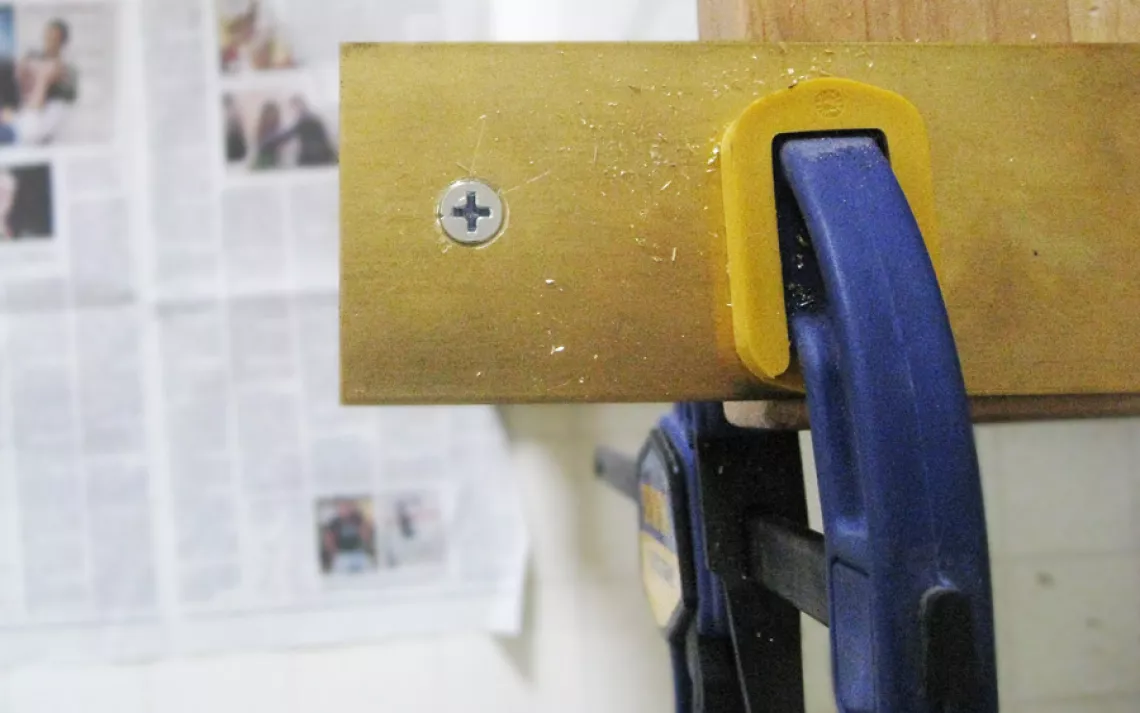
Step 3: Use the larger drill bit to make the necessary indentation for the machine screw to lay flush with the metal.
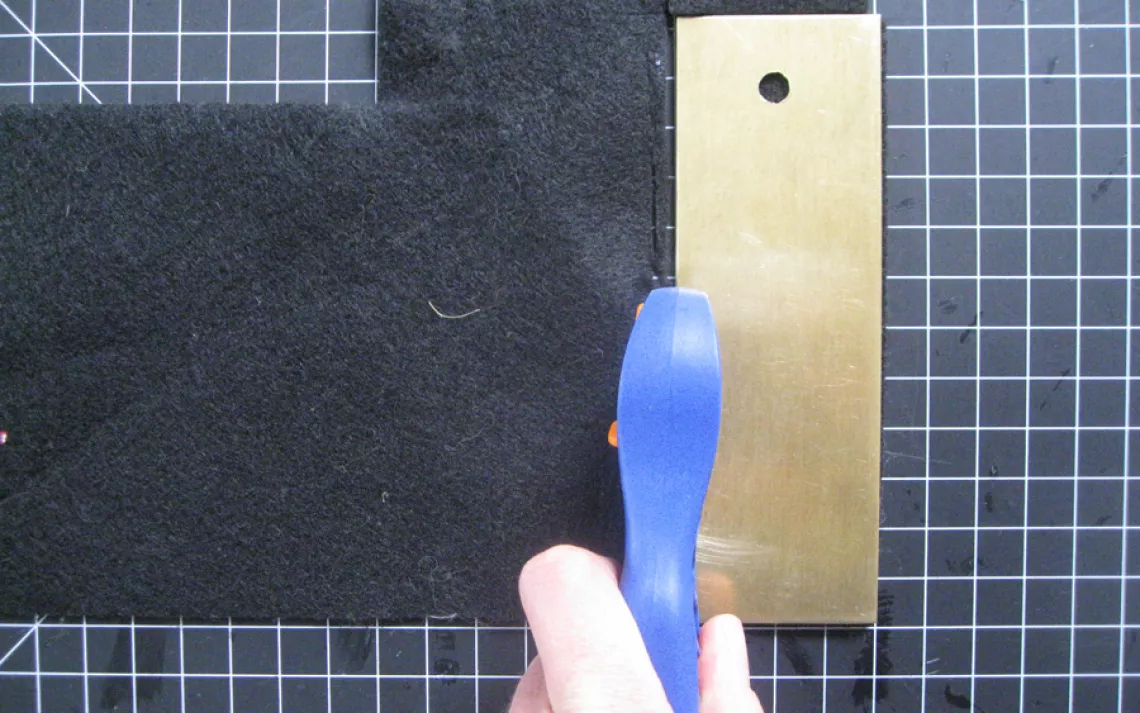
Step 4: Cut out a piece of felt sized to the metal piece.
Wendy Becktold
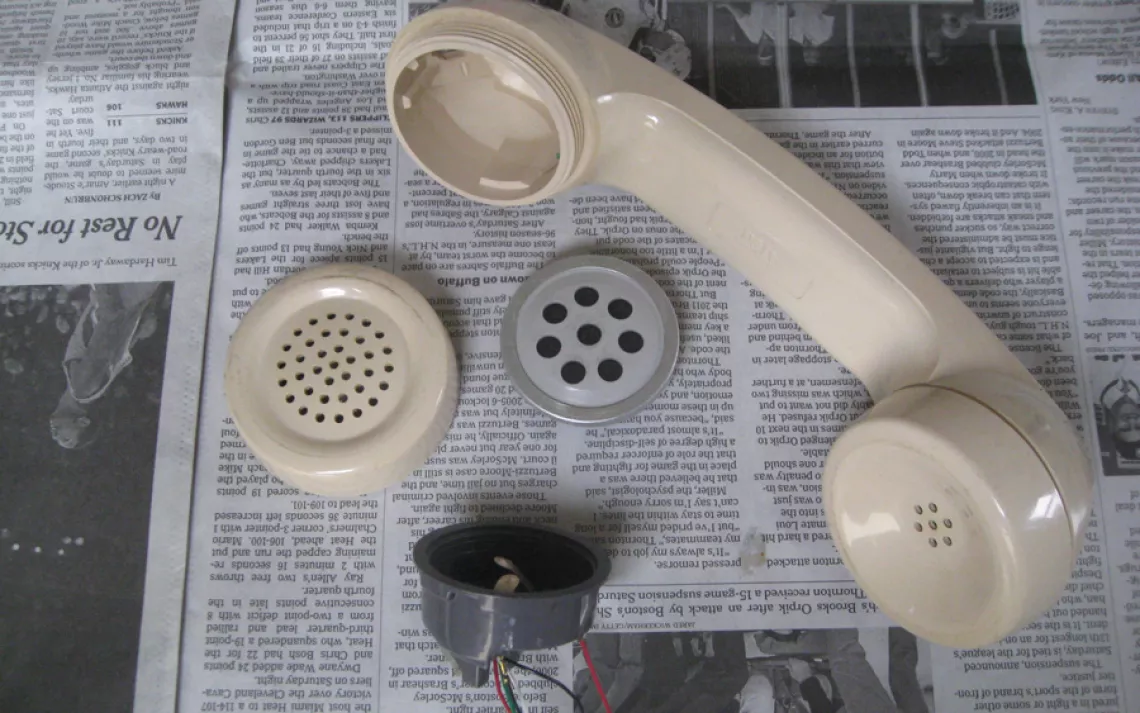
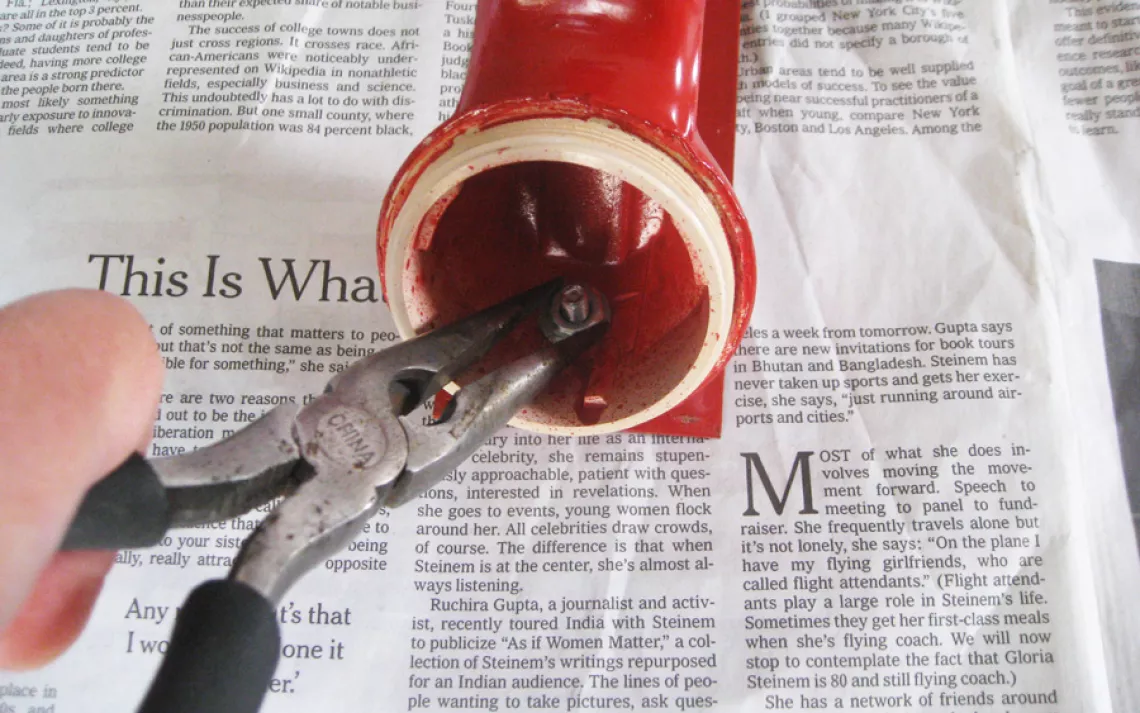
Step 5: Unscrew the mouthpiece and take out the microphone (use the pliers to pull or clip the wires free).
Wendy Becktold
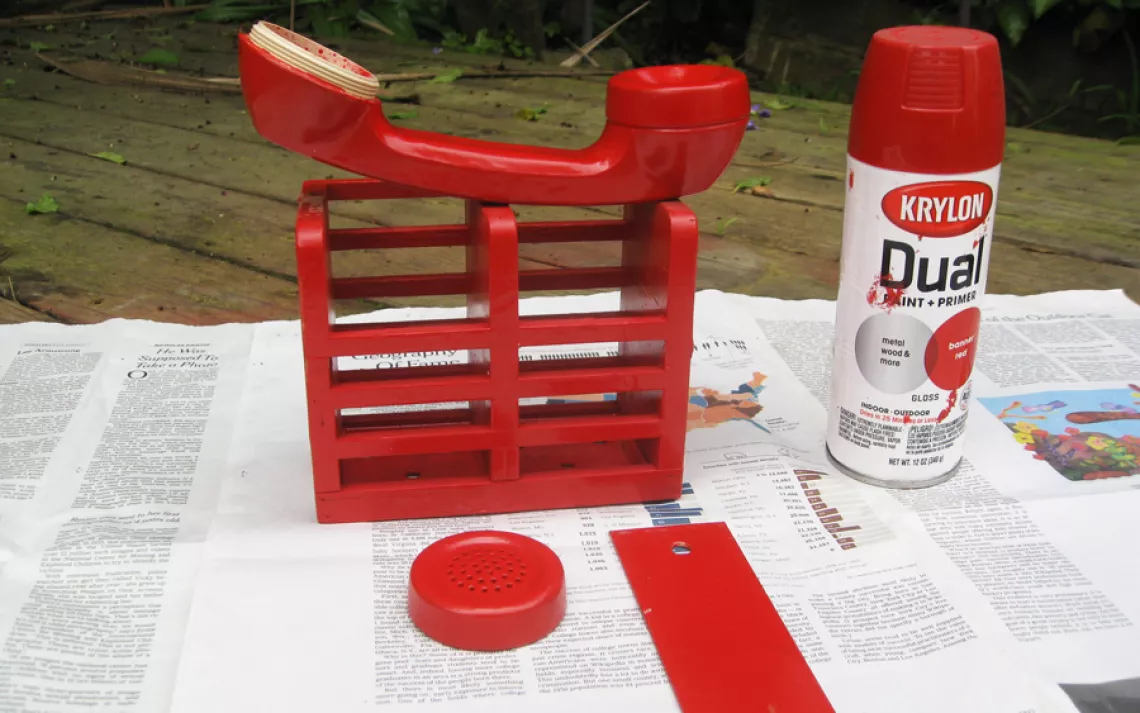
Step 6: In a well-ventilated area (preferably outside), spray-paint one side of the handset, the mouthpiece (the mouthpiece should be unattached and painted separately), and the metal piece. Gently apply several coats and allow each to dry fully (Note: This can take an entire day). Here's a good resource for detailed spray-painting instructions.
Wendy Becktold
Step 7: Turn over the handset and the metal piece and apply several more coats; allow to dry fully.
Wendy Becktold
Step 8: Glue the felt strip to the metal piece. Snip the fabric where it lays against the hole in the metal.
Wendy Becktold
Step 9: Insert the machine screw through the metal hole and place a washer on it.
Wendy Becktold
Step 10: Place the handset on the metal piece, put the second washer on the screw, and attach the nut, tightening it with the pliers.
Wendy Becktold
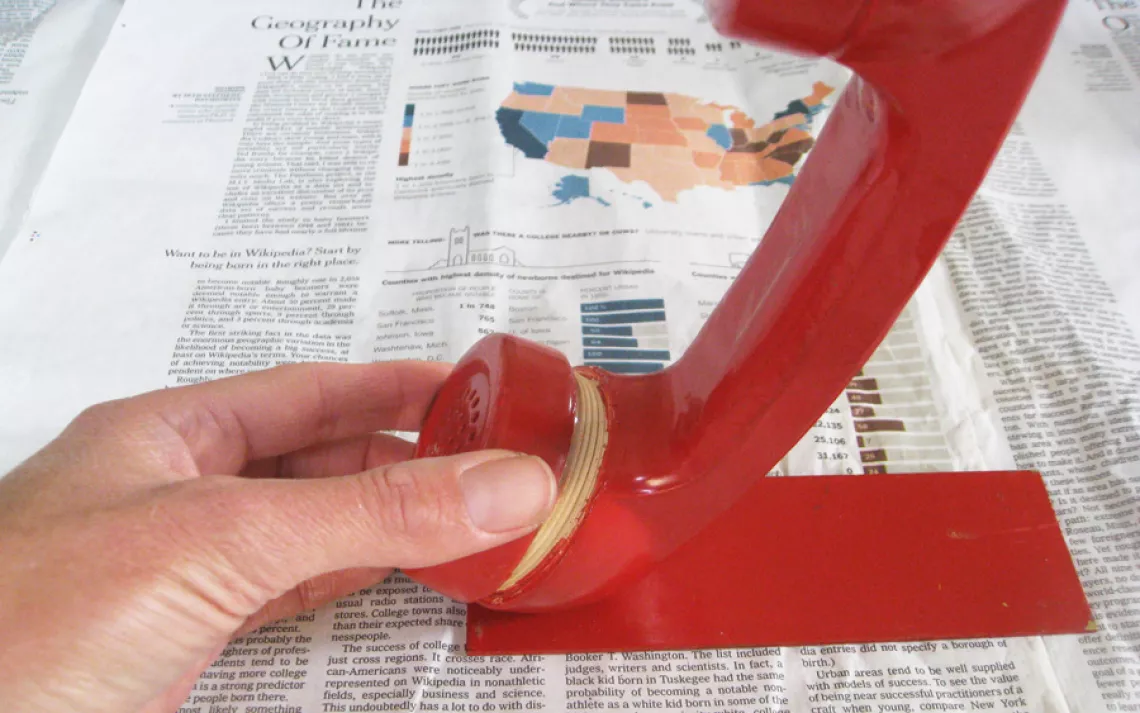
Step 11: Screw on the mouthpiece.
Wendy Becktold
Step 12: Set on your bookshelf and enjoy.
Lori Eanes
Difficulty Level: 5 (You need to drill through metal)
Construction Time: 2 hours (plus time for the paint to dry)
Based on a project by Erin Thiessen and Stefanie Hiebert at ohsolovelyvintage.blogspot.com.